Trusted Senders is a feature that allows you to list specific E-mail addresses or domains (The portion of the address that follows the @ symbol) that will be exempted from SPAM filtering. This can prevent mail from friends, business associates, and mailing lists from being blocked and lets the system know that these messages come from a trusted source. It is important to note that this feature still runs all of the filtering and scores the E-mail, but it will then deliver the message to the inbox ignoring the score completely. Although this behaviour does add a very significant additional load on our mail server, the scoring information in the headers can sometimes be helpful.
-
Log into your E-mail account by visiting the webmail portal located at https://ShastaEmail.com, then fill in your E-mail address and password, and click Login.

-
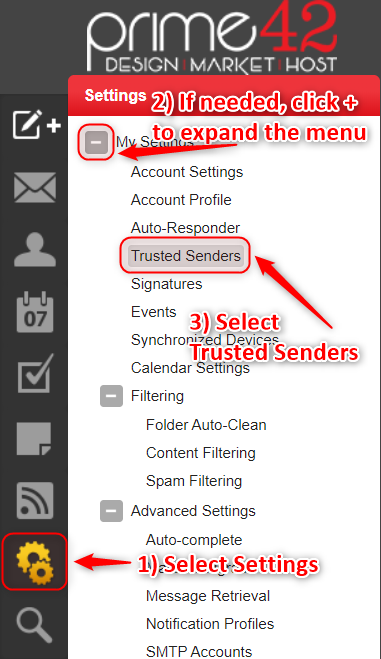
- On the left side is a vertical row of icons. This is the top level of navigation. Select the two gears for Settings.
- If the section for My Settings is not already expanded, click on the plus sign to expand it.
- Select Trusted Senders.
-
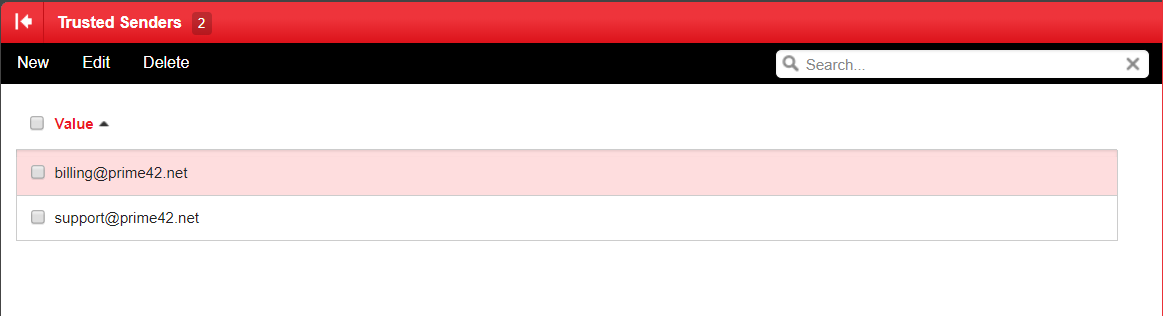
The screenshot below shows any Trusted Senders. If you have not yet created any, then there will not be much to see except the New, Edit, and Delete buttons at the top. In this image billing@prime42.net and support@prime42.net have been added to show what the Trusted Senders list looks like. You do not need to add this address. Because it is important to us at prime42 that if you need help you will receive a reply, the address support@prime42.net is already a Trusted Sender at the global server level.
In the header of the Trusted Senders list is a check box that will select all of the Trusted Senders at once. About the only time this becomes useful is if you wanted to delete all of your Trusted Senders at one time. Each line in the list can be selected or deselected individually with the checkbox in front of the E-mail address of the Trusted Sender. The three buttons at the top are New, Edit, and Delete. To edit a Trusted Sender address you select the line, but you must only select one, then click on the Edit button. To delete an address or multiple addresses, select what you want to delete and click the Delete button. Finally, the New button allows you to add new addresses to your Trusted Senders list. You may add more than one at a time, just enter them one per line in the text entry box that appears after you click New.