prime42 does sane, rather than aggressive filtering of your E-mail. We would hate to be responsible for you losing an important E-mail that could have serious consequences if it is never received. By default most legitimate mail should reach your inbox, however it is possible some might be filtered out and be placed in a Junk E-mail Folder. If you are not using IMAP to keep the folders in your E-mail program in sync with what is on the server, you may need to login to webmail to check the contents of the Junk E-mail Folder. We give you the option to override what happens to your filtered E-mail at three different thresholds.
-
Log into your E-mail account by visiting the webmail portal located at https://ShastaEmail.com, then fill in your E-mail address and password, and click Login.

-
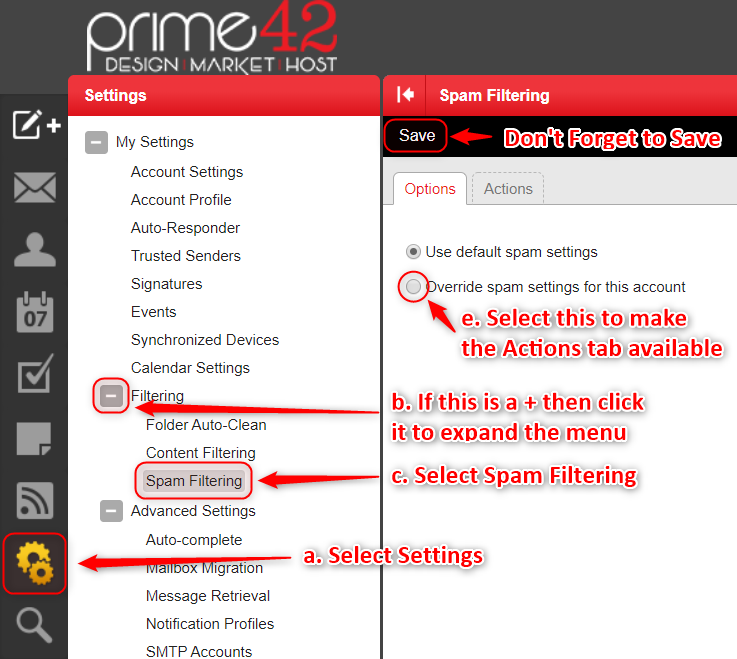
The icons on the far left side are the top level of the menu.
- Select the two gears icon on the left, this is the settings menu.
- To the right of the icons are the sub-menus. These change based on the icon selected on the left. The top level menus in this section have a square with either a "+" or "-" in them that expand and collapse the menu items under them. If it is not already expanded, click the plus sign next to "Filtering" to expose the sub-menu
- Select "Spam Filtering."
- Unless changes have already been made to your SPAM settings in the past, you will notice that the options tab shows "Use default spam settings."
- When "Override spam settings for this account" is selected, the action tab will become available. If it is not already selected, do so.

-
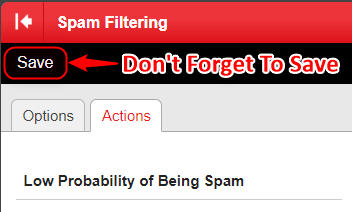
Now that the "Action" tab has become active, select it. The server default options are selected. You may choose to change this. The image shown here and throughout the rest of these instructions shows the controls, but not necessarily the settings you will find currently set.

-
You can select how to handle filtered messages at each level. If you need to determine what mail is getting assigned which level, we suggest you setup adding text to the subject with a low, medium, and high indication as shown. After a week or two of watching how the messages are scored you can come back with an educated idea of what you wish to do. The options available are as follows:
- No Action – just what it says, this mail will not be touched.
- Delete Message – you will never see any mail that was classified at this level. It is gone forever.
- Move to Junk E-mail Folder – This moves it to the Junk E-mail folder in your webmail. This does not move them to a junk folder in your E-mail program. You can occasionally login to webmail and check this folder if you wish. There are exceptions, for example: if you are using IMAP to check your mail, it is possible you might see the Junk E-mail folder because IMAP uses the same folders that exist on the server already.
- Add Text to Subject – Using the text added to the subject can be handy for creating filters in your E-mail program. For example, you can create a filter that puts any E-mail that arrives when checked which has the text SPAM-HIGH in the subject line into your Junk E-mail folder. In this way no message every gets thrown out by our mail server and you can deal with them locally.

-
Finally — This is VERY important: Click on the save button. The save button will always be above the first tab. As you become familiar with your settings, remember to always hit save after making changes. In this case the save button is above the "Options" tab.


