This how to is based on stardard AOSP version of Android and the built in Gmail app.
AOSP (Android Open Source Project) describes the base Android operating system as delivered by Google. AOSP provides the Gmail app as its standard E-mail client. Different phone and tablet manufacturers then further customize this and add their own applications and user interface changes. Then cell phone carriers sometimes add another layer of customizations, applications, and user interface changes. As such it is impossible to create a how to that will cover all of the possible combinations. Therefore we provide a how to that is based on the standard that everything starts from.
Setup a New Account
-
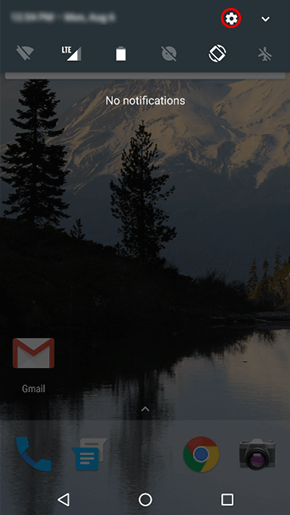
Pull down the Notifications Bar at the top of the screen and select the gear icon for Settings.
-
Scroll down to Accounts and select it.

-
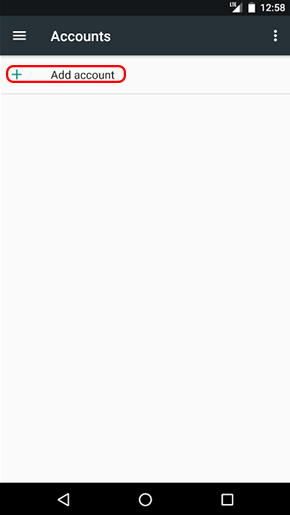
Click Add account.
-
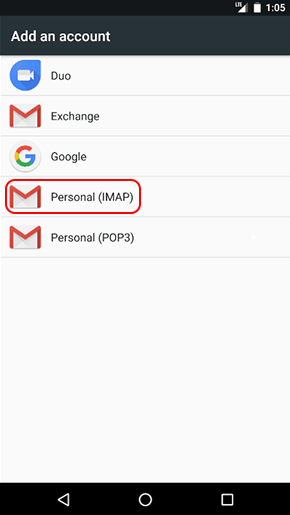
Select Personal (IMAP).
-
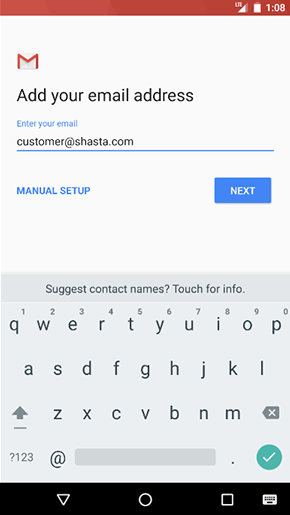
Enter your E-mail address, then Select MANUAL SETUP (not NEXT.)
-
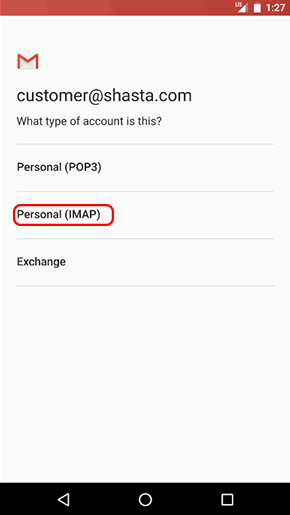
Select Personal (IMAP).
-
Enter your Password and press NEXT.

-
Incoming server settings: Change server to shastaemail.com, ensure the port is 143, ensure security type is STARTTLS, and press NEXT.

-
Your phone will try to validate the Incoming server settings are correct.
-
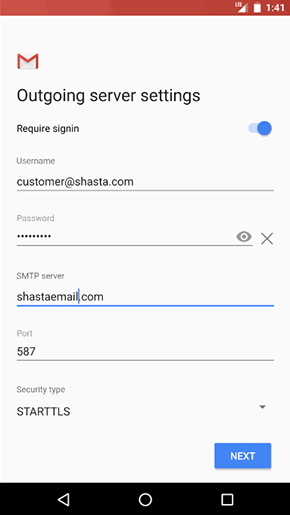
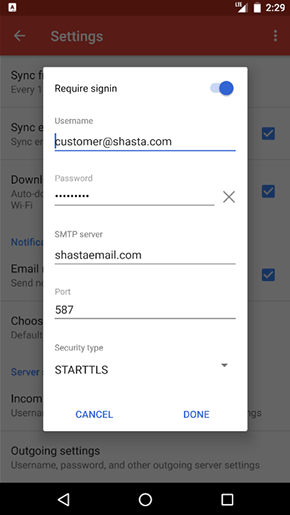
Outgoing server settings: Change server to shastaemail.com, ensure the port is 587, ensure security type is STARTTLS, and press NEXT.
-
Your phone will try to validate the Outgoing server settings are correct.
-
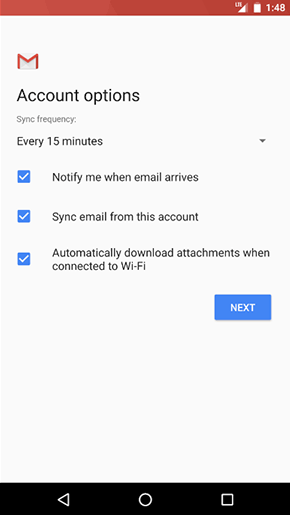
The next screen lets you choose some account options. Typically you will leave these be unless you have a good reason to change them. However, you may wish to change the sync frequency to more often than every 15 minutes. Press NEXT.
-
You account will get created.

-
Enter a name to identify this account (or leave it as it,) and enter your name. Press NEXT.

-
Your account will now appear on the accounts list. You are done.
Modify an Existing Account
-
Pull down the Notifications Bar at the top of the screen and select the gear icon for Settings.

-
Scroll down to Accounts and select it.

-
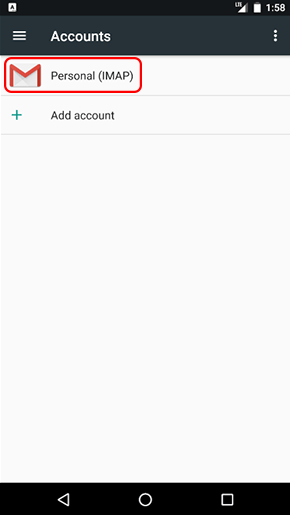
Select the account you want to change.
-
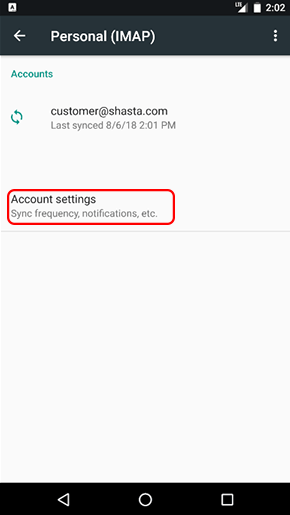
Select Account settings.
-
Select the account you want to change (again.)
-
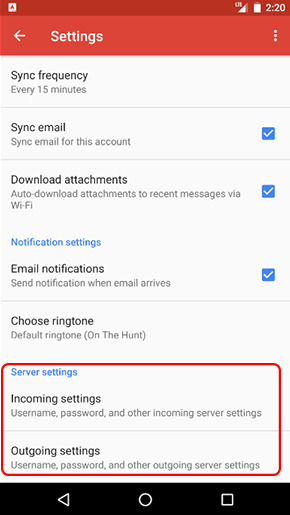
Make changes as needed. For account settings changes scroll down to the Server settings and select either Incomming settings or Outgoing settings.
-
For Incoming Settings: make changes as needed then click DONE.

-
For Outgoing Settings: make changes as needed then click DONE.
-


