Note: The best way to fix a broken or misbehaving account is to:
- Delete the account.
- Reboot the iPhone / iPad.
- Add the account back to the iPhone / iPad.
Instructions to Delete an Account are at the bottom of this page.
Setup a New Account
-
Open
 Settings, then:
for iOS / iPadOS ≤ 17, scroll down and select Mail, then Accounts.
for iOS / iPadOS ≥ 18, scroll down and select Apps, then Mail, then Accounts. -
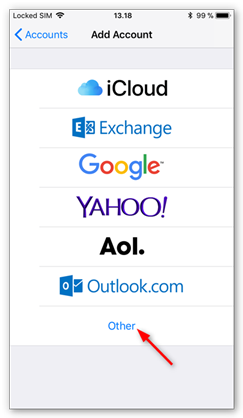
Select Add Account.

-
Select Other.
-
Select Add Mail Account.

-
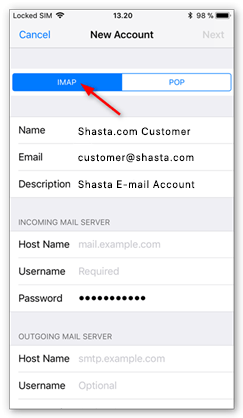
Enter your Account Details
- Name: Enter your name.
- E-mail:Enter your E-mail address
- Password: Enter your password.
- Description: This is how you will tell this account from others setup on this device.
Click on Next to continue.

-
Select IMAP for the account type. Then click on Next to continue.
-
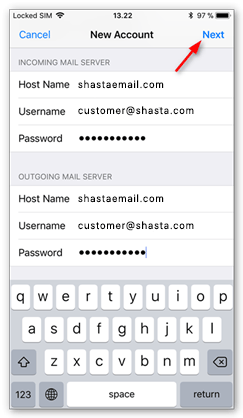
The server settings are the same for both the incoming and the outgoing sections. Enter the following in both places.
- Host Name: mail.shastaemail.com
- Username: your E-mail Address
- Password: your E-mail password
Click on Next to continue.
-
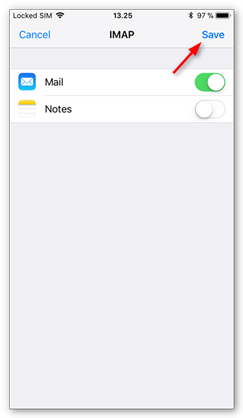
Disable the syncing of Notes, then click on Save.
-
You are now done. You can exit E-mail settings.


Delete an Email Account
-
Open Settings, then:
for iOS / iPadOS ≤ 17, scroll down and select Mail, then Accounts.
for iOS / iPadOS ≥ 18, scroll down and select Apps, then Mail, then Accounts. -
Tap the email account you want to remove from your iPhone / iPad, then tap "Delete Account".
